Hi Everyone!! Today, I am going to share with you How To Change Heading Colour In Gutenberg Editor. The new WordPress Gutenberg Editor is a block editor. It is named after Johannes Gutenberg who invented the printing press. It contains different blocks to add different things. It contains common blocks such as – Paragraph, Heading and other blocks such as Button, Image. After the new WordPress 5.0 Update, people are facing many problems with Gutenberg Editor and one of
How To Change Heading Colour In Gutenberg Editor
Downloading The Plugin – SiteOrigin CSS
- The first step to Change Heading Colour In Gutenberg Editor is Downloading The Plugin – SiteOriginCSS. Download the plugin – https://wordpress.org/plugins/so-css/
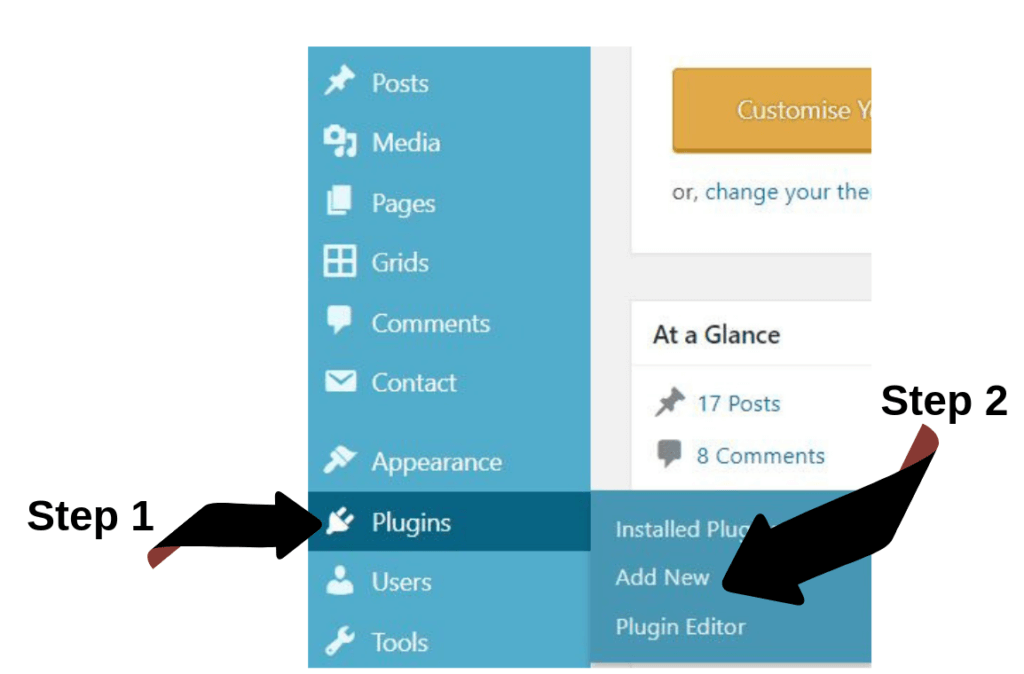
- Go to your website’s Admin Dashboard.
- Then click on Plugins > Add New (on the top right).
- SearchSiteOrigin CSS, click on Install Now and click Activate.
Must Read: Top 10 Best Premium WordPress Themes
The second step to Change Heading Colour In Gutenberg Editor is Using The Plugin, which is the main part of the post. It has
Using The Plugin (Part 1)
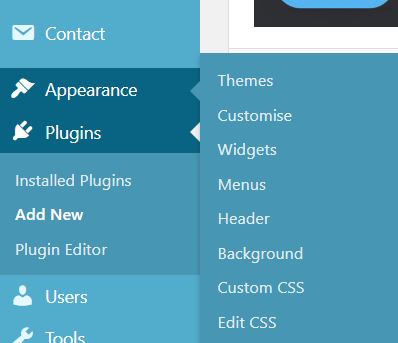
- Go to Appearance > Custom CSS.
- Now click on ? icon present in the opened window as shown in the image given below.
Using The Plugin (Part 2)
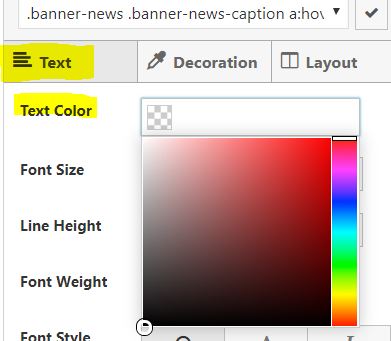
1. Now click on the type of heading which you want to change the color of. If you want the change of all the H2 heading in your blog select any one heading. Same is with other heading types also.

2. Now go to Text tab in the settings on the left.
3. In Text Color option, change the color which you want.
Saving The Settings
1. Last step on Changing the Colour of Heading is Saving The Settings.
2. Click on ☑
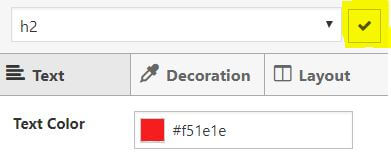
2. This will redirect you to the Custom CSS page.
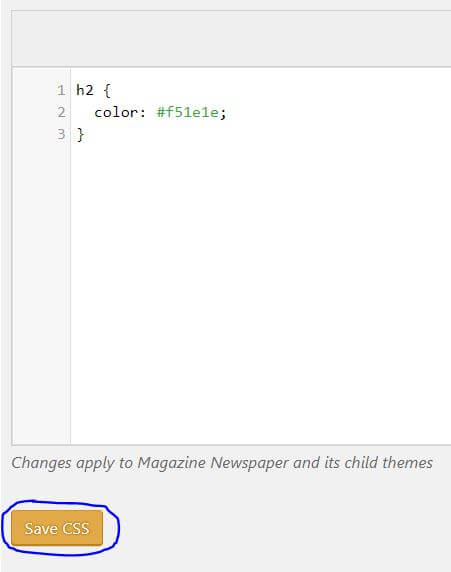
This will save the CSS and change the color ofthe heading which you changed. So, this was all about How To Change Heading Colour In Gutenberg Editor. If you have any doubts, then comment in the comment box below.