Hi Everyone!! You will be glad to know that you can Set Up Hosting With SiteGround in just 15 minutes. SiteGround is one of the best web hosting companies for a newbie as well as a professional.
What I like about SiteGround is their customer support which is amazing. They provide you a 24/7 support. They also give and install a free SSL certificate for your website.
In this DIY tutorial, I will be sharing the steps to set up hosting with SiteGround. So, let’s start with the steps.
Set Up Hosting With SiteGround In Just 15 Minutes
Step 1: Go to SiteGround.com
Step 2: Choose a Hosting Plan
To start with you can choose the StartUp plan as it has all the essential features which you require to start your website.
The GrowBig and GoGeek plans are great as well, but they become more relevant once your visitor count increases or if you want to host multiple websites on the same hosting plan.
Step 3: Review and Complete
To continue with the process, you will have to enter your personal information and credit card details.
- Review the plan you have chosen.

- In the Plan Details section, select the data center and the tenure of your plan.

- In the Payment Summary section, enter your card details.
- Then, check the box after reading and agreeing to SiteGround’s Terms of Service and Privacy Policy.
- At last, click on Pay Now.
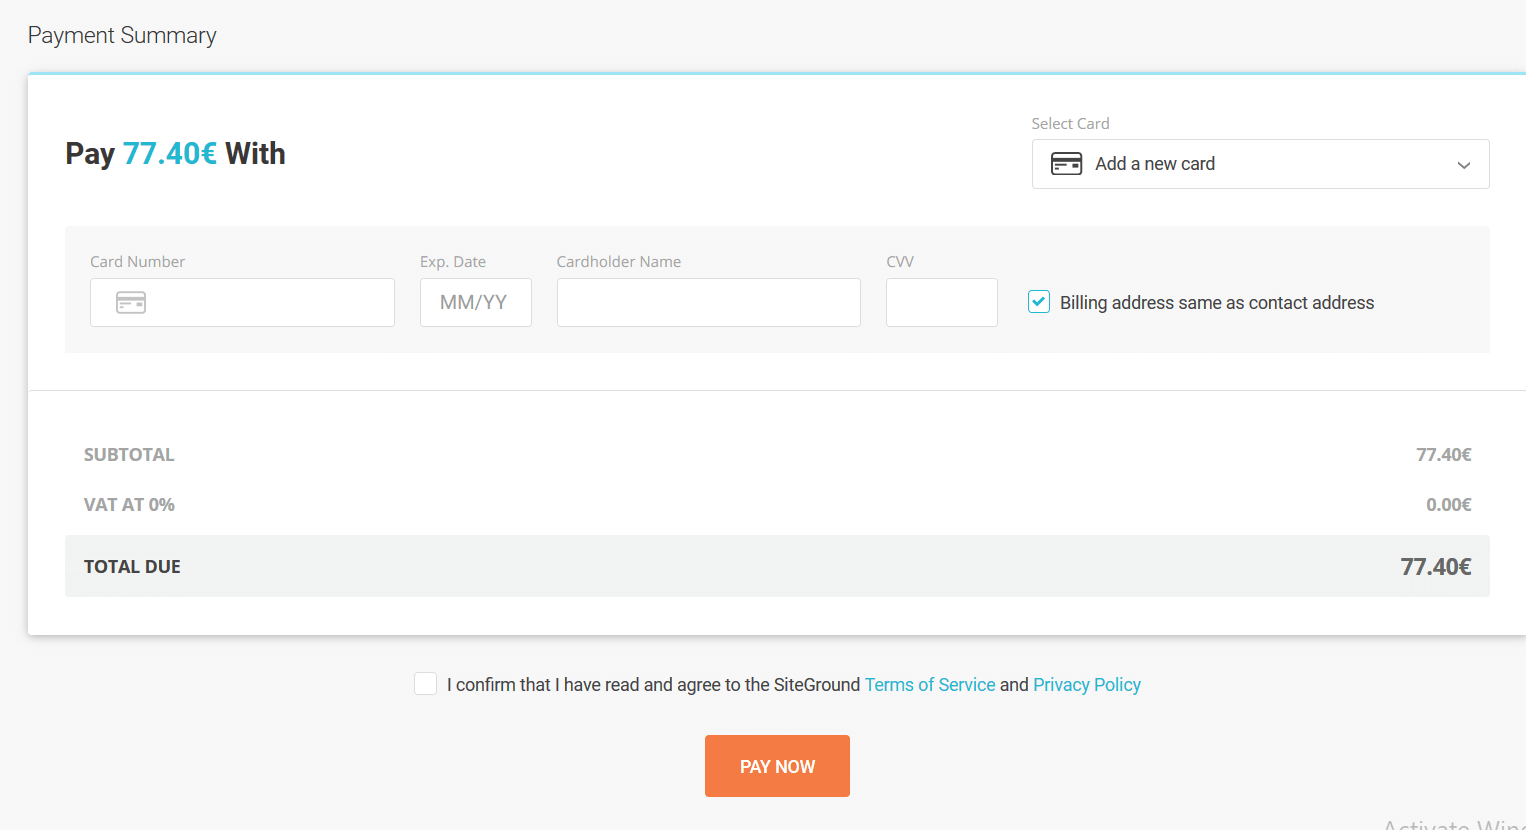
Note: 1 month trial has an expensive setup cost.
Step 4: Enter a Domain Name
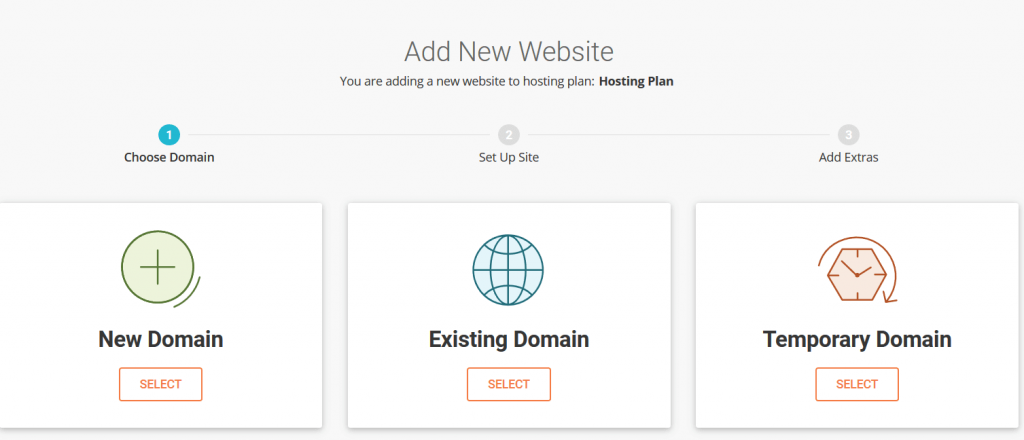
Now there will be 3 options in front of you:-
- New Domain: If you haven’t already purchased the domain then, type in the domain name you want and check for its availability.
- Existing Domain: If you have purchased the domain then, enter your domain name.
- Temporary Domain: SiteGround provides you a domain temporarily. It helps you to get started with your website without wasting time on thinking a name for your website.
After choosing one of these options, click Continue.
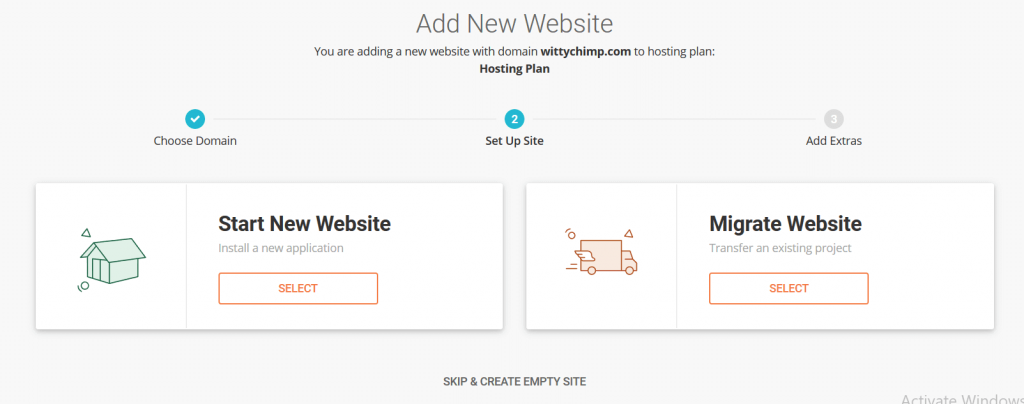
You will get a setup wizard right away, providing you a few options:
- Start New Website: If you have decided on which CMS or Blogging platform to choose then this option will take you through the necessary installation steps.
- Migrate Website: Choose this option if you already have a website on different web hosting.
- SKIP & CREATE EMPTY SITE: This option is present at the bottom of the page. If you choose this option, SiteGround will create an empty site for you.
Must Read: Install WordPress On SiteGround (New Interface)
Must Read: How To Start A Blog In 2020 From Scratch
After choosing and completing the steps for any of these options, there will be an option to add SG Site Scanner. Decide if you want to add or not and click on Finish.
Congratulations! You have finished setting up hosting with SiteGround.
So, these were the steps to Set Up Hosting With SiteGround in Just 15 Minutes. If you liked the post, then share it and comment down to share your review of the post.
